Back to TheWorxHub for Senior Living Main Menu
Managing Security User Roles
There are a few common user roles you may want to use in the management of your Security application. Once you create the necessary user roles, you can then add a new user to the system with that role, or change an existing user to the new role that includes Security permissions. *Note: If you do not currently have this application, please contact your Sales Representative or Client Services for more information.
Watch the Video Tutorial:

Common Security User Roles
- Security Manager - The top level in the hierarchy of responsibility for security. This user would also be responsible for setting up security rounds in the system. This may be an organization manager or a manager specific to the Security program.
- Security Supervisor - An additional layer in the hierarchy of responsibility that is sometimes used depending on the size of the organization.
- Security Officer - Users who do inspections of the grounds and respond to incidents. These users will most likely be the ones who complete security rounds.
How to Set Up Security User Roles
- Click on the Settings tab, then select the Users tab.
- Find the user role in the list of My Roles that most closely resembles the user role you need for Security. For example, if you already have a role for Manager, click on Manager to begin setting up the Security Manager role. Typically, a Technician role is used to create the role of Security Officer.
Updating an Existing User Role
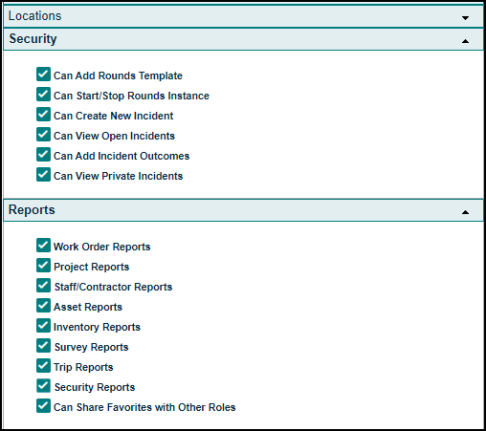
- If you would like all users in this existing role to now have Security permissions, click on the Security panel of the User Role permissions window.
- Check the box next to all permissions you want this role to have. Typically, a Security Manager will have all Security permissions, whereas a Security Officer will have all except Can Add Rounds Template. See the Security Permissions section below for a description of each permission.
- If you would like the users in this role to be able to run Security reports, click on the Reports panel and check the box next to Security Reports.
- Click Save.
Creating a New User Role
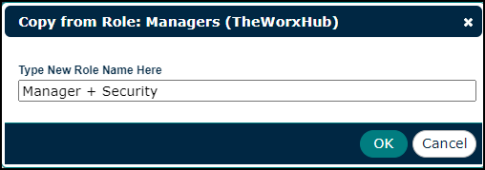
- If you would like a separate user role specific to Security Manager or Security Officer, click Copy Role at the top of the screen.
- In the pop up window, enter the name for the new role, then click OK.
- Click on the new role in the list.
- All permissions from the copied role will already be checked off, but can be edited as needed.
- Click on the Security panel of the User Role permissions window.
- Check the box next to all permissions you want this user role to have. Typically, a Security Manager will have all Security permissions, whereas a Security Officer will have all except Can Add Rounds Template. See the Security Permissions section below for a description of each permission.
- If you would like this user role to be able to run Security reports, click on the Reports panel and check the box next to Security Reports.
- Click Save.
Security Permissions
- Can Add Rounds Template - Allows a user to create a Rounds Template, which is similar to a work order template. Rounds templates essentially build the rounds schedule.
- Can Start/Stop Rounds Instance - Allows a user to start and stop a Rounds Instance, which means they can perform an individual security round.
- Can Create New Incident - Allows a user to create a new Security Incident to report a security related issue which may or may not be found during a security round.
- Can View Open Incidents - Allows a user to view open Security Incidents, whether or not they submitted the incident themselves.
- Can Add Incident Outcomes - Allows a user to enter information for the Outcome of an Incident, whether or not they submitted the incident themselves.
- Can View Private Incidents - Allows a user to view all incidents set as private from the security app.
- Security Reports (This option is found under the Reports panel) - Allows a user to run all Security reports.
How to Set Up a Security User
Once you have created your user roles for Security, you can apply them to staff. If you only updated the permissions for existing roles, the staff member's permissions will update automatically. However, if you created a new user role for the Security permissions, you'll need to change the staff member's role in their profile. We recommend checking your staff list before adding any users, just in case a member of your Security team was already in the system under a different user role.
Updating an Existing User
- Click on the Search tab, then select the Staff/Contractors tab.
- Enter the Staff/Contractor Name, and click Search Now.
- In the search results list, click on the staff member's name.
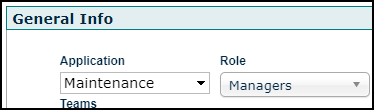
- In the Role drop down, select the new user role.
- Update anything else in their profile as necessary for their use in the Security app, such as Department or Location Access. *Note: Any Security user must be tied to at least one Department, such as Maintenance or Housekeeping. This allows them to submit work requests to that particular department if needed.
- Click Save.
Adding a New User
- Click on the Add button at the top right corner of the page and select Staff/Contractor/Supplier.
- Select the appropriate Department. *Note: Any Security user must be tied to at least one Department, such as Maintenance or Housekeeping. This allows them to submit work requests to that particular department if needed.
- Choose the appropriate Role.
- Enter the staff member's Email and check off the appropriate email notifications.
- If the staff member belongs to a team, click on the Teams field and select one from the list. When a team is assigned to work orders, all staff assigned to the team will see those work orders on their dashboard under the Just My Work section. *Note: Staff can be assigned to multiple teams if needed.
- Enter the staff member's First Name and Last Name.
- Type a Username, then create a password by typing it in the Staff Password and Retype Password fields.
- Click Save.
- Once the staff member is saved, more panels will appear to enter more details about them. Use these panels to select the correct Location Access, Working Hours, and various other information as appropriate for this staff member. For more information about adding a new staff member to TheWorxHub, click here.
